y-t Graph of Wave
YUKIMURA
Introduction to High School Physics
In this lecture, we will learn about drawing reflected waves. Since we have already learned the basics of reflections, we will start with the explanation.
If you would like to review reflections, click here.

Reflection is a simple phenomenon, so it is not difficult as long as you understand at least a few things, such as the difference between a free-end and a fixed-end.
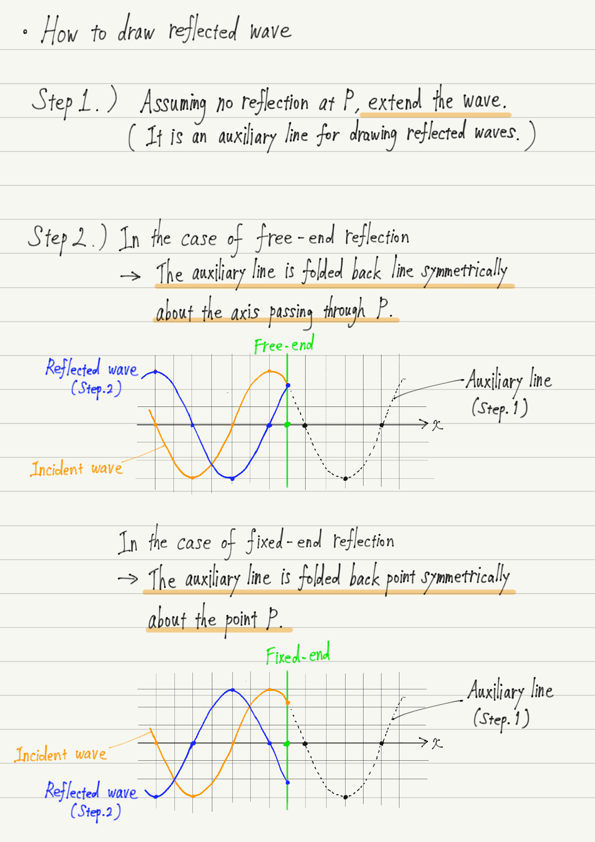
Now we will show the procedure for drawing the reflected wave in detail.
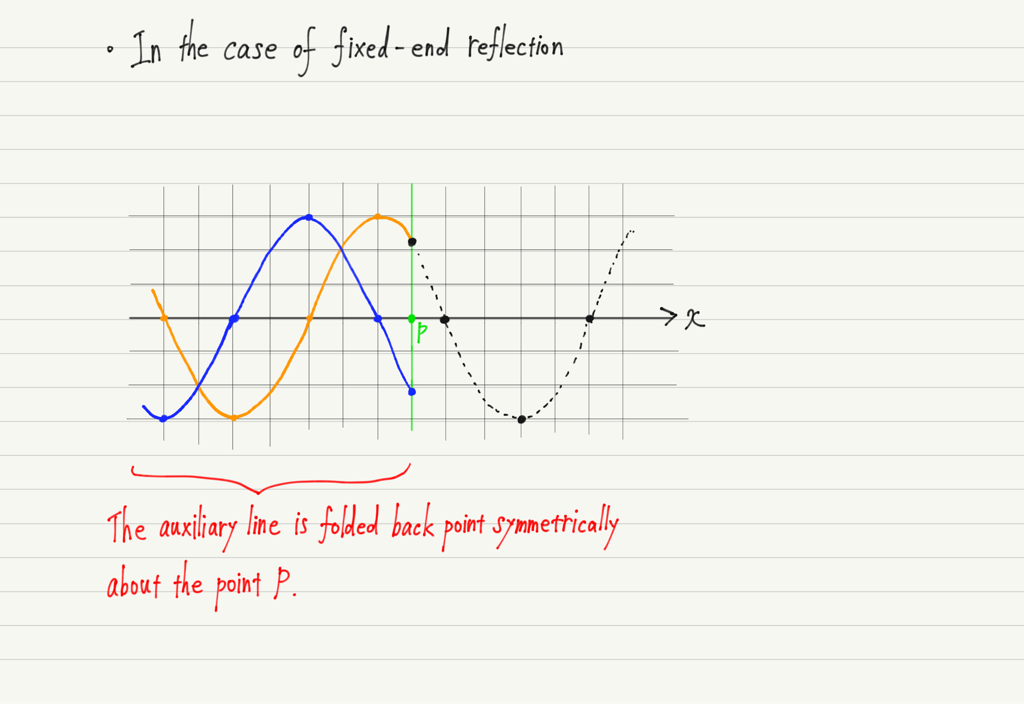
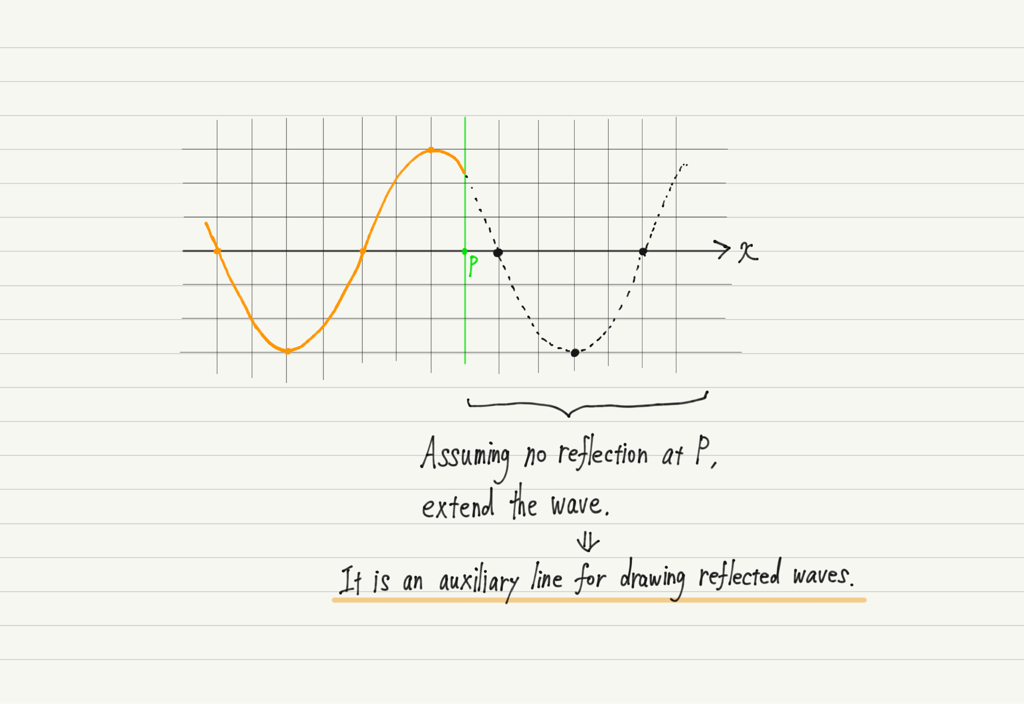
In the example, the wave is incident from the left toward endpoint P.
Since the wave is reflected at the endpoint, the reflected wave must exist to the left of P.
However, in order to draw a reflected wave, we first need an “auxiliary line”.
In the first step, we draw the auxiliary line to the right of P!
Drawing the auxiliary line is simple.
Write the wave that is interrupted at the endpoints and continue it to the other side of P.
In doing so, be sure to check the points to be passed.
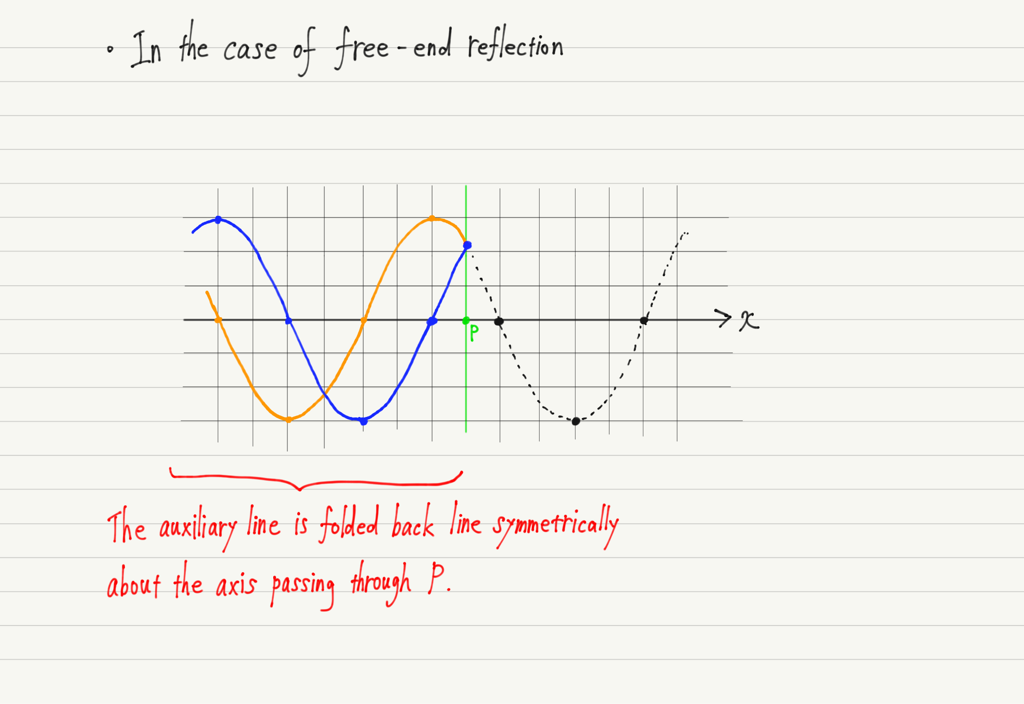
Now all we have to do is to draw the reflected wave using the auxiliary lines we just drew!
Note, however, that the method differs for free-end and fixed-end reflections.
First, in the case of free-end reflections, the auxiliary line is folded back line symmetrically about the axis through the endpoint.
The wave drawn in folded form is the reflected wave of the free-end reflection.
Next, for fixed-end reflections .
The auxiliary line wraps around the endpoints point symmetrically.
This completes the reflected wave in the case of fixed-end reflection.